Hue/Saturation/Luminosity
The Hue/Saturation/Luminosity command allows you to adjust the color, intensity and brightness of the active picture or selected area.
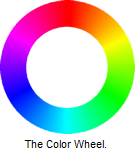
The Hue slider adjusts the picture by rotating each color around a circular color wheel. The color wheel contains red, yellow, green, cyan, blue, magenta and everything in between. The slider value represents how many degrees the original colors are rotated around the wheel. Drag the slider to the right to rotate the colors clockwise or drag the slider to the left to rotate the colors counterclockwise.
The Saturation slider Increases or decreases the light intensity of each color in the picture. Drag the slider to the left to decrease saturation or drag the slider to the right to increase saturation. Each pixel is changed by a percentage of its present saturation level.
Use the Luminosity slider to increase or decrease how much black is added or subtracted from each color. Drag the slider to the left to darken the picture or drag the slider to the right to lighten the picture.
The Reset buttons ![]() can be used to clear any adjustments made to one of the sliders. You also can enter a value with the keyboard by clicking on the edit control to the right of each slider.
can be used to clear any adjustments made to one of the sliders. You also can enter a value with the keyboard by clicking on the edit control to the right of each slider.
The original picture and the effects of your changes are shown in the Before and After preview windows. Drag the vertical slider to adjust the magnification level of the preview images. Click the ![]() button to shrink the preview images so that they fit completely within the preview window, or click the
button to shrink the preview images so that they fit completely within the preview window, or click the ![]() button to display the preview image actual size (1:1). If needed, you may move the preview to display a different portion of the picture using the scroll bars or by dragging its center with the mouse. The
button to display the preview image actual size (1:1). If needed, you may move the preview to display a different portion of the picture using the scroll bars or by dragging its center with the mouse. The ![]() button can be used to quickly zero in on a specific area of the picture.
button can be used to quickly zero in on a specific area of the picture.
When you are satisfied with your settings, click the Apply button to modify your picture or selection.